How to Use b.VPN – L2TP/OpenVPN Client for iOS
Click here to download b.VPN for iOS.
To purchase b.VPN plan using iTunes account:
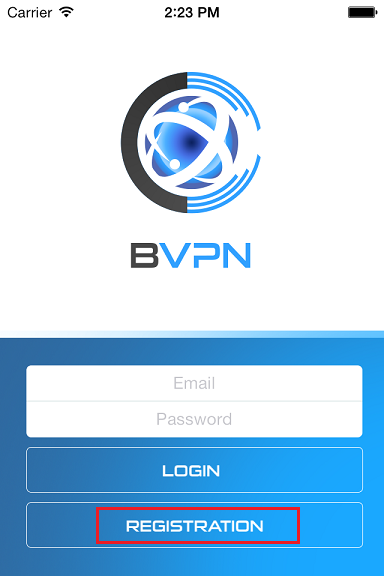
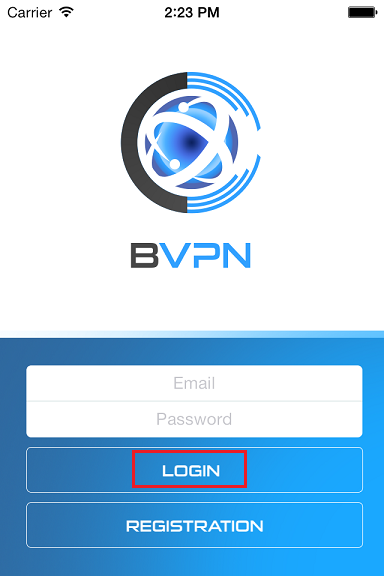
If you haven’t registered for a b.VPN account yet, tap on “Registration”.
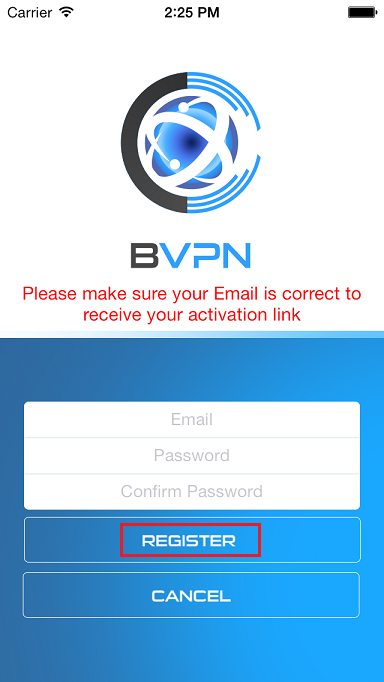
Provide a valid Email address and a Password then tap on “Register”.
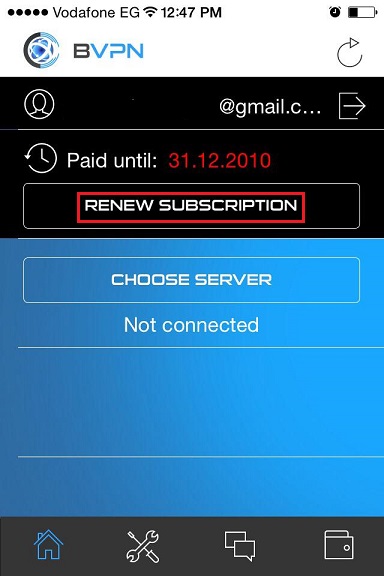
Once your account is activated, insert your Email and Password and tap on “Login”.

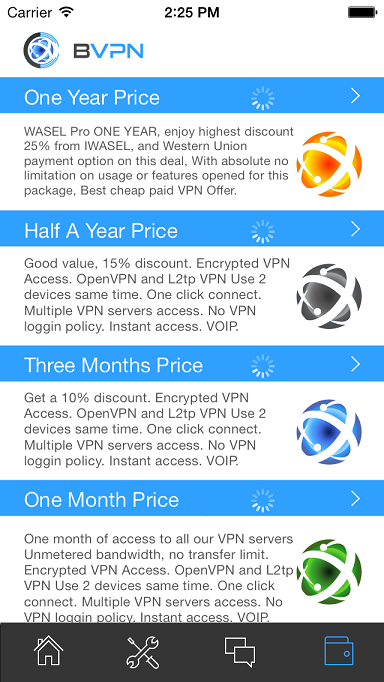
Now tap on “Renew Subscription”.
Tap on your preferred b.VPN plan.
If you have already purchased b.VPN plan:
Insert your Email and Password and tap on “Login”.
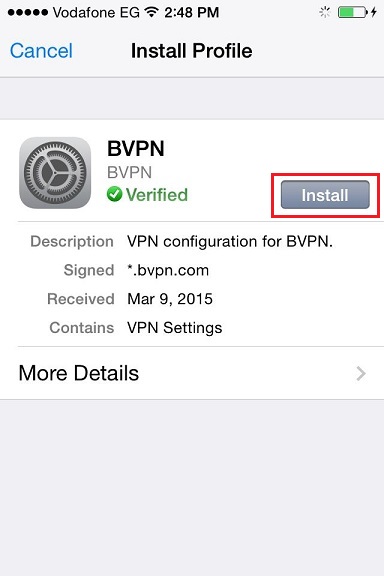
A notification message will appear, tap on “Install”.
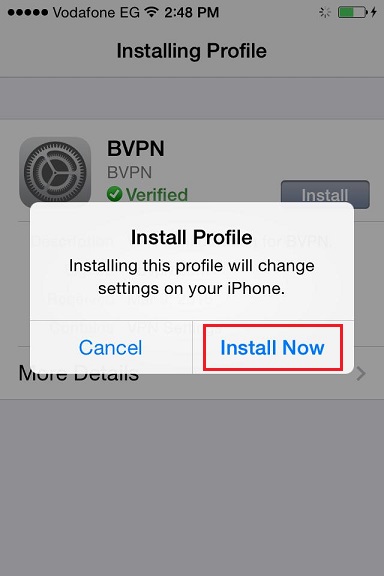
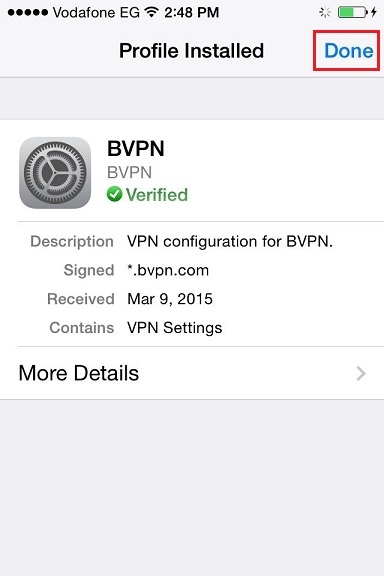
You will have to confirm the installation of the VPN Profile by providing your 4-digit passcode then tap “Install Now”.
Now tap on “Done” to switch back to b.VPN application.
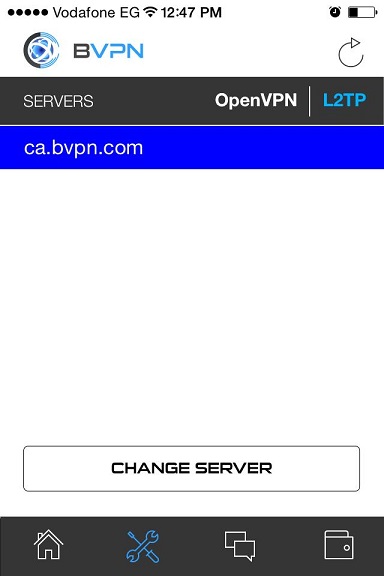
Tap on your preferred b.VPN server.
Turn “the “VPN” button “ON”.
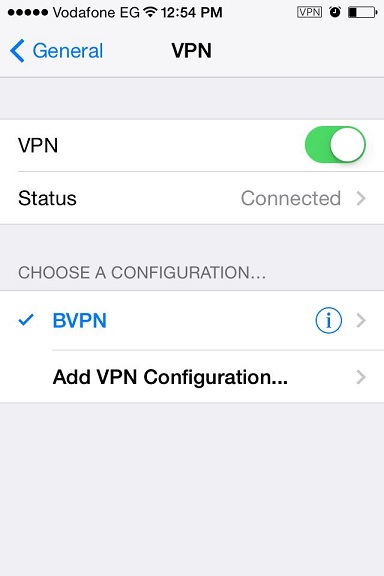
This is how the screen will look after you’re connected.
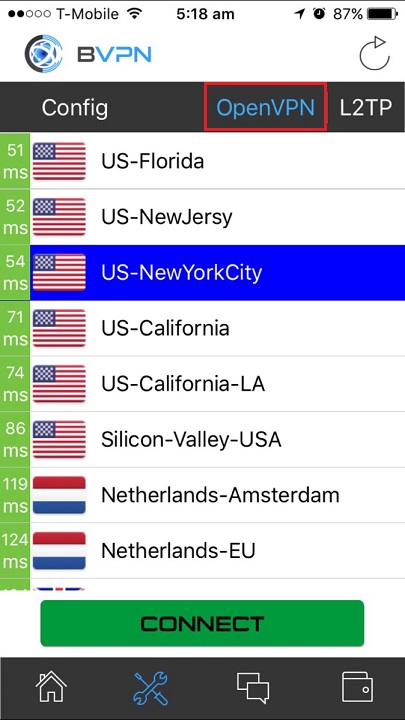
In case connection fails with L2TP, you may try using OpenVPN.
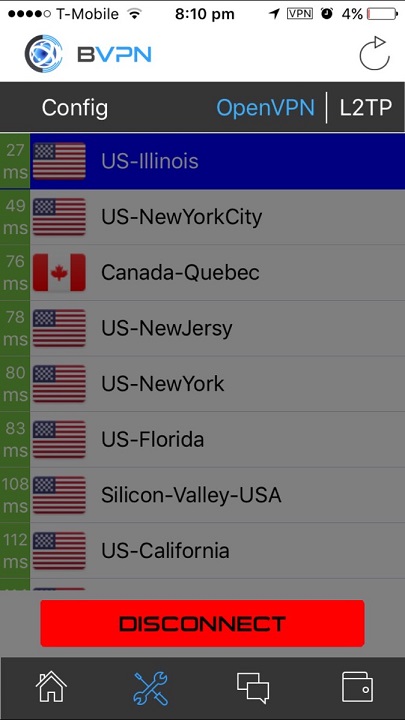
Tap “OpenVPN”. A list of availbale servers will appear with hints of ping reply next to each server.
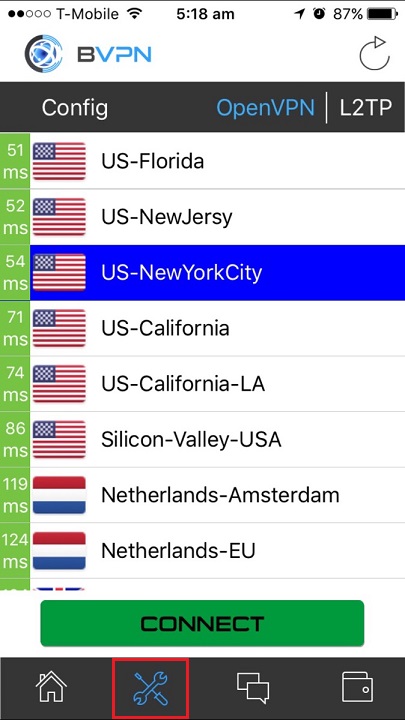
Tap “Settings” icon to choose from the available tunneling protocols.
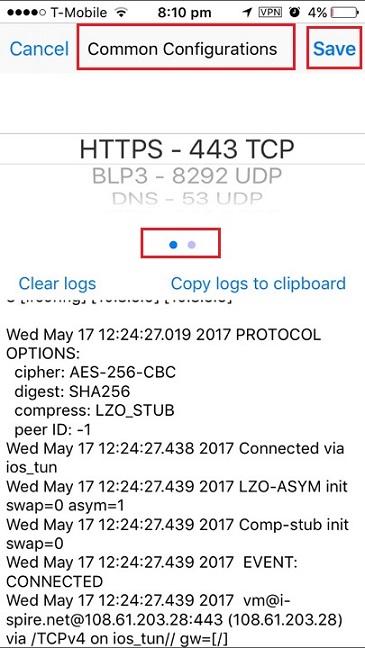
You will find 2 options: common configurations and custom configurations. Select your preferred settings then tap "Save".
SMOKE tunnel works on 3 modes: TCP, UDP and Hybrid.
You can also turn "Connect on Demand" button "ON". This option will automatically turn VPN on whenever your device is connected to the Internet.
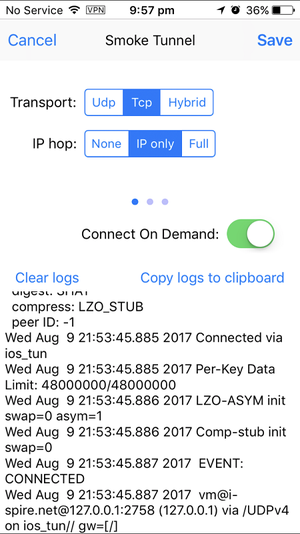
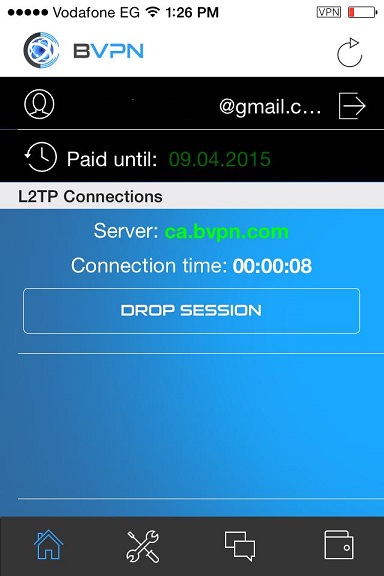
Now tap your preferred server then tap "Connect".
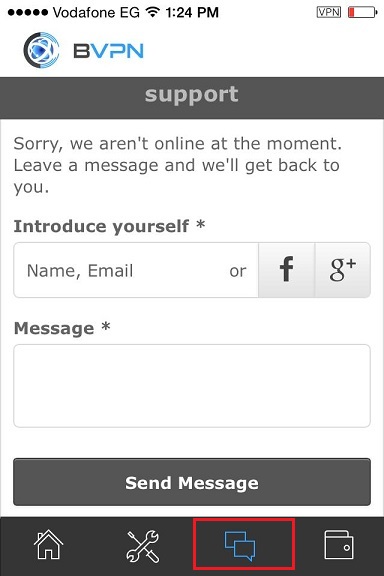
If you have any inquiries, tap on “Chat” icon to contact b.VPN support team.